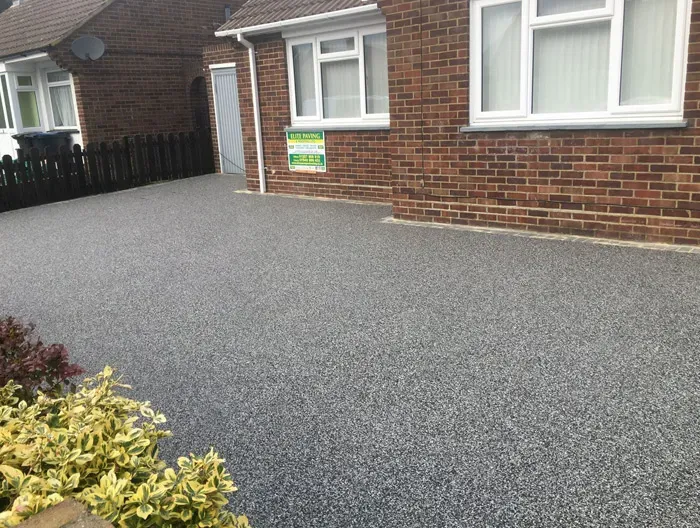
How the two systems are actually laid
The confusion comes from the names sounding almost identical, yet the site preparation and mixing method could not be further apart.
Resin-Bound (Mixed & Trowelled)
Clean, kiln-dried stone aggregates are tipped into a forced-action pan mixer alongside a two-part polyurethane resin. Every single stone is coated before the mix hits the ground.
We barrow the wet mix onto a sound porous base and hand-trowel it flat to a depth of 15mm to 18mm for driveways (or 20mm+ where vans or heavier vehicles park). Because the stones sit together with tiny air voids between them, water drops straight through the surface into the sub-base below.
Resin-Bonded (Spread & Scattered)
A layer of resin is squeegeed or rollered directly over an existing hard surface—usually solid concrete or non-porous tarmac. Dry aggregate is then broadcast by hand over the wet resin, much like surface-dressing a country lane.
Once cured, any unattached stone is swept off. The finished coat is only around 3mm to 5mm thick, feels sharp and gritty underfoot, and forms a completely sealed, waterproof skin on top of the old drive.
Side-by-side comparison for driveways
| Feature | Resin-Bound | Resin-Bonded |
|---|---|---|
| Drainage | Permeable (water drains through the voids) | Non-porous (rainwater runs off the surface) |
| Finished thickness | 15mm – 18mm (20mm+ for heavy traffic) | 3mm – 5mm thin surface dressing |
| Surface feel | Smooth, flat, easy for wheelchairs and prams | Rough, exposed gravel texture |
| Loose stones | Locked inside the cured slab; no loose gravel | Sheds stone where tyres twist or brake |
| Front garden rules | SuDS-compliant when laid on a permeable base | Requires linear drains/soakaways over 5m² |
Loose-stone wear and why UV-stable resin matters
Two issues account for almost every failed resin driveway we get called out to inspect: stone plucking on bonded toppings and yellowing on cheap bound mixes.
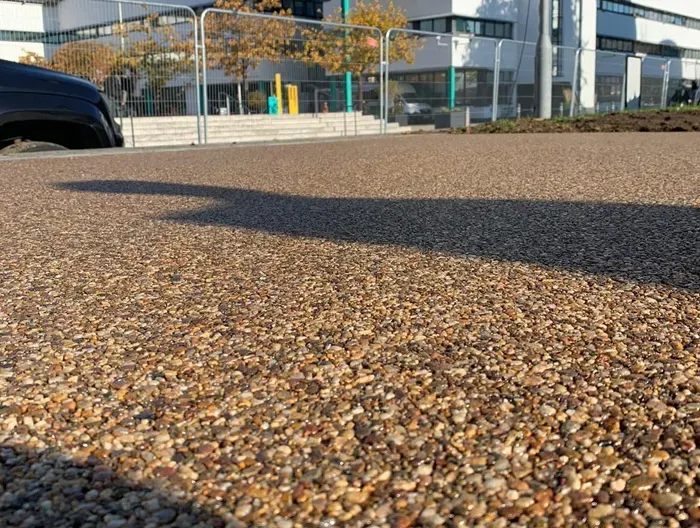
Loose-stone wear on resin-bonded drives
In a resin-bonded finish, only the bottom half of each grit sits in the glue. The moment a driver turns the steering wheel while stationary—known as dry-steering—the tyres shear those exposed stones free. Over two or three winters, tyre tracks start showing dark bald patches of bare resin underneath. That is why we rarely recommend bonded toppings for tight residential turning areas; they belong on low-traffic paths or light commercial walkways rather than busy family driveways.
Aliphatic (UV-stable) vs aromatic resin
When you choose a resin-bound system, check the tin before a trowel touches the ground. There are two types of polyurethane binder on the market:
- UV-stable (aliphatic) resin: Stays crystal clear in direct sunlight. It costs a little more per kit, but silver greys, creams, and pale Cornish quartz keep their true colour year after year.
- Non-UV (aromatic) resin: Turns amber-brown where sunlight hits it. If part of your drive sits in the shade of a garage wall and the rest gets afternoon sun, an aromatic mix will leave a noticeable yellow tidemark within a single summer.
On every job we quote, we only use UV-stable aliphatic resin and properly washed, kiln-dried aggregate. Damp stone or moisture in the mix causes foaming and white milky patches, which cannot be patched out invisibly later.
Why resin-bound suits front gardens and planning rules
If you are replacing a lawn or front garden with more than five square metres of hardstanding, rainwater has to go somewhere rather than pouring straight onto the street. Under the GOV.UK permeable surfacing guidance, you normally do not need planning permission if the new surface allows water to drain naturally through into the ground beneath, or directs run-off into a lawn or border within your own boundary.
Because a resin-bound topping is porous by design, pairing it with a compacted MOT Type 3 permeable sub-base and open-grade binder course tarmac creates a full Sustainable Drainage System (SuDS). A non-porous resin-bonded topping over old concrete does not allow water through—so for front drives over 5m², you would need channel drains leading to a soakaway or rainwater garden, or check the Planning Portal front garden paving rules before starting work.
If you want to see how we build the sub-base, edgings, and drainage channels from the ground up, take a look at our Canterbury resin driveway installations for full details on our groundwork process.
Repair or full replacement: honest judgement on site
Resin is only ever as strong as what sits underneath it. When we inspect an existing drive, here is how we decide whether you can overlay or need a full dig-out:
When an overlay or local repair works
If you already have a sound, uncracked concrete slab or solid asphalt drive with good falls away from the house damp-proof course, we can often repair minor surface pitting, fit perimeter block edging to hold the new height, and lay resin-bound directly over the top (allowing for drainage channels where non-porous concrete sits below).
When a full excavation is essential
If your existing tarmac is crazed, sinking along wheel ruts, lifted by tree roots, or laid over block paving that rocks underfoot, overlaying resin will fail—every crack underneath will mirror straight through the new resin within a year. In that case, we dig out to full depth, lay geotextile membrane, compact Type 3 stone, and install a fresh open-graded tarmac base before trowelling the resin.
What drives the price, and what happens on the day
Square-metre rates for resin vary widely because the resin kit itself is only part of the job. The real cost drivers are:
- Sub-base work: Overlaying a sound base takes a fraction of the labour and muck-away compared to excavating 200mm+ of clay, installing Type 3 aggregate, and laying binder tarmac.
- Aggregate choice and depth: Standard 15mm pedestrian paths cost less than 18mm–20mm driveway depths, and specialist imported quartz or granite blends carry higher material costs than local flint/pea-shingle blends.
- Edgings and recessed covers: Concrete or block-paved kerbing to contain the resin edge, recessed steel manhole trays (so inspection covers blend cleanly into the stone), and Aco drainage channels along garage doors.
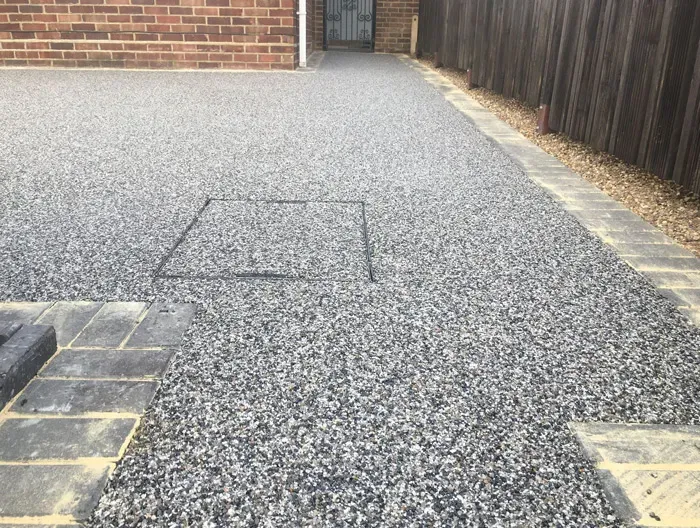
Block-paved borders and recessed drain covers keep edges crisp and tidy.
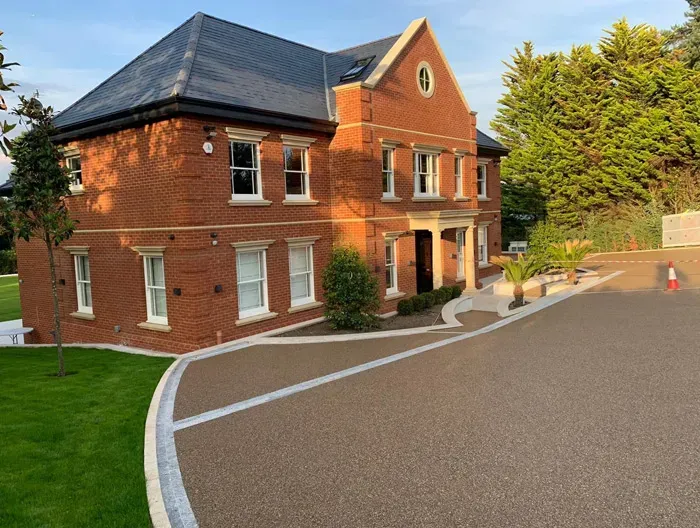
A completed full-depth resin-bound installation cured and ready for daily vehicle use.
Realistic timescales and weather windows
A full excavation and new sub-base typically takes two to three days depending on driveway size, followed by one dry day to lay the resin-bound surface itself. Resin is moisture-sensitive while curing, so we never lay it in rain or on a damp base—we watch the forecast closely and schedule the pour for a dry window.
Once trowelled and finished, we tape off the entrance. Foot traffic is usually fine after 6 to 8 hours, and normal family cars can drive back onto it after 24 hours (a little longer in cold winter weather). Keeping the surface swept free of wet leaves and giving it an occasional low-pressure rinse keeps the pores open and draining well for years.