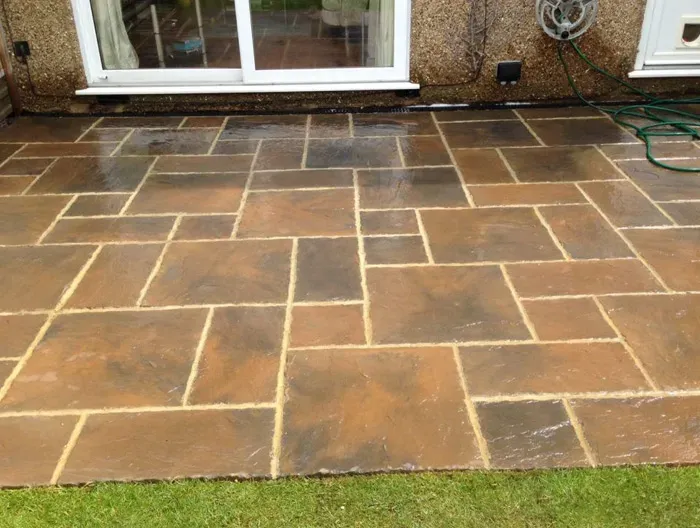
A solid full mortar bed and well-tooled pointing keep natural stone slabs locked down year after year.
The Three Main Causes of Loose Patio Slabs
When we lift an older patio around Canterbury or anywhere else across Kent, we usually find one of three culprits straight away. Knowing which one you are dealing with helps decide whether a targeted fix will hold or whether the base needs proper attention.
1. Spot-bedding ("dot and dab") voids
Many older patios were laid on five blobs of mortar—one in each corner and one in the middle—rather than a continuous full bed. It saves time on installation day, but leaves hollow voids under up to half of each slab. Over time, ants tunnel through the gaps, heavy garden furniture puts point-loads on unsupported corners, and the bond snaps. Tap a suspect slab with a wooden handle: if it sounds hollow, there is a void underneath.
2. Cracked pointing letting water and weeds underneath
Mortar joints take a beating from rain, garden hoses, and pressure washers. Once hairline cracks open up in the pointing, surface water tracks straight down into the bedding layer. Weak or sandy mortar gradually washes away, leaving edges unsupported. Weed seeds blow into the damp cracks, and as roots thicken they wedge the neighbouring slabs apart.
3. Frost heave and sub-base movement
When water pools inside spot-bedding voids or soaked soil beneath the paving, a hard winter freeze makes it expand. That upward pressure—known as frost heave—jacks slabs off their mortar bed. In parts of Kent with heavy clay ground, patios laid straight onto soil or thin sharp sand without a compacted MOT Type 1 sub-base will also dip and twist as the ground swells in winter and shrinks in dry summers.
When a Repair Is Enough vs Full Replacement
You do not always need to rip out an entire patio just because a few flags are rocking. Being honest about what is worth saving saves homeowners a lot of unnecessary spend.
A targeted repair makes sense when:
- Only a handful of slabs are loose or rocking, usually around steps, edges, or heavy foot-traffic spots.
- The main sub-base underneath is solid and has not sunk across the whole garden.
- Water still drains away from the house rather than pooling against the brickwork.
- The existing stone or concrete slabs are unbroken and still match cleanly once cleaned up.
Full relaying is better when:
- More than a third of the patio rocks, sinks, or shows hollow sounds when tapped.
- Slabs were laid directly onto dirt or loose sand with no compacted hardcore sub-base.
- Levels fall back towards the house wall, risking damp bridging above the damp-proof course.
- Multiple slabs are cracked through or flaking from frost damage and replacements no longer match.
If your sub-base is sound and the damage is isolated, re-bedding the affected slabs and repointing the joints restores the patio properly without the cost of starting from scratch.
How Proper Re-Bedding & Repointing Fixes the Root Cause
Squirting grab adhesive under a wobbling slab or dusting dry sand and cement into a crack only hides the fault for a few months. To stop a slab coming loose again, the old failed bedding has to come out completely.
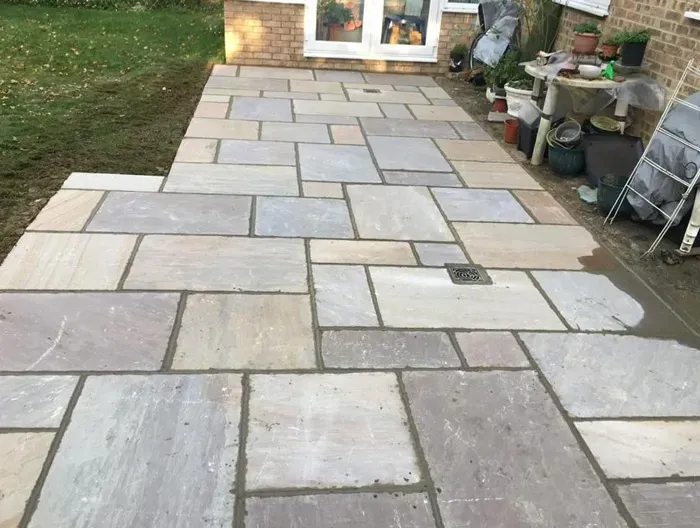
Full-bed relaying: We lift the loose slabs carefully, chip away old mortar from the underside, and dig out crumbling bedding down to firm sub-base. A fresh full bed of moist, well-mixed mortar is spread evenly—never spot-bedded—and tamped down to match surrounding heights and drainage falls.
Bonding primer for porcelain & dense stone: Smooth porcelain and some calibrated stone slabs do not grip standard mortar on their own. Applying an SBR slurry primer to the back of the slab creates a chemical and mechanical bond so it cannot pop loose later.
Choosing the right repointing method
Once the slabs have set firm, all failing joints are raked or carefully cut out with a diamond blade to a clean depth (at least 25mm where slab thickness allows) so the new pointing has something solid to key into.
- Traditional sand-and-cement mortar pointing: Mixed stiff and pressed firmly into the joints with a pointing trowel or iron. It cures rock-hard, resists pressure washing better than most alternatives, and suits older concrete flags as well as sandstone.
- Resin brush-in jointing compound: A fast, permeable option that works well on natural riven stone with deep, wide joints (5mm+). It lets surface water pass through, though the joint must be clean, deep, and laid on a permeable bed—shallow joints or dirty edges will cause resin pointing to crumble out within a year or two.
What Drives the Cost & What Happens on the Day
Homeowners often ask for a flat price per slab, but repair costs vary based on what we find once the first slab comes up:
- Number and size of slabs: Heavy 900x600mm flags take two people to lift safely without chipping edges, whereas smaller setts or 450mm slabs are quicker to handle.
- Sub-base condition: If the MOT Type 1 beneath has washed out or subsided, it needs topping up and compacting with a wacker plate before new mortar goes down.
- Pointing area and joint width: Cutting out hard old cement pointing across an entire patio takes far more labour than raking out soft, sandy mortar around a dozen slabs.
- Waste disposal: Old broken mortar, spoiled bedding, and damaged slabs must be cleared legally. Whoever takes waste away from your property should be registered on the Environment Agency waste carrier register.
Realistic timescales & site clean-up
Most targeted slab repairs and repointing jobs take one to two days, depending on size and weather. When cutting out old joints with an angle grinder, we keep dust controlled with water suppression and protect nearby doors, walls, and garden beds. Once pointing is finished, the patio is swept and washed down tidy, and we ask you to keep foot traffic off newly bedded slabs for 24 to 48 hours while the mortar cures properly.
Quick Checks You Can Do Before Getting a Quote
- Do the tap test: Gently tap slabs with the wooden handle of a mallet or broom. Mark any that sound hollow or dull compared to solid ones nearby.
- Check after rain: Look for puddles sitting in low spots or water tracking towards your house wall instead of towards the lawn or a channel drain.
- Inspect the pointing: Look for hairline cracks, crumbling mortar, or deep gaps where weeds keep returning despite pulling them out.
- Avoid high-pressure jetting on weak joints: Holding a pressure washer nozzle close to cracked pointing blasts out even more bedding mortar underneath and speeds up loosening.